> ## Documentation Index
> Fetch the complete documentation index at: https://docs.visitoai.com/llms.txt
> Use this file to discover all available pages before exploring further.
# Build your AI agent
> Create your account, train your agent with your data, test it in real time, and connect it to the channels.
### Steps
Upload documents, add website URLs, or write free-form text.\
Your agent learns from this content to understand your brand, products, and operations.
Use the built-in testing panel to ask questions and validate responses in real time. Adjust data sources or behavior settings until your agent answers exactly how you want.
Deploy your agent anywhere
* Webchat widget
* Instagram, WhatsApp, Messenger
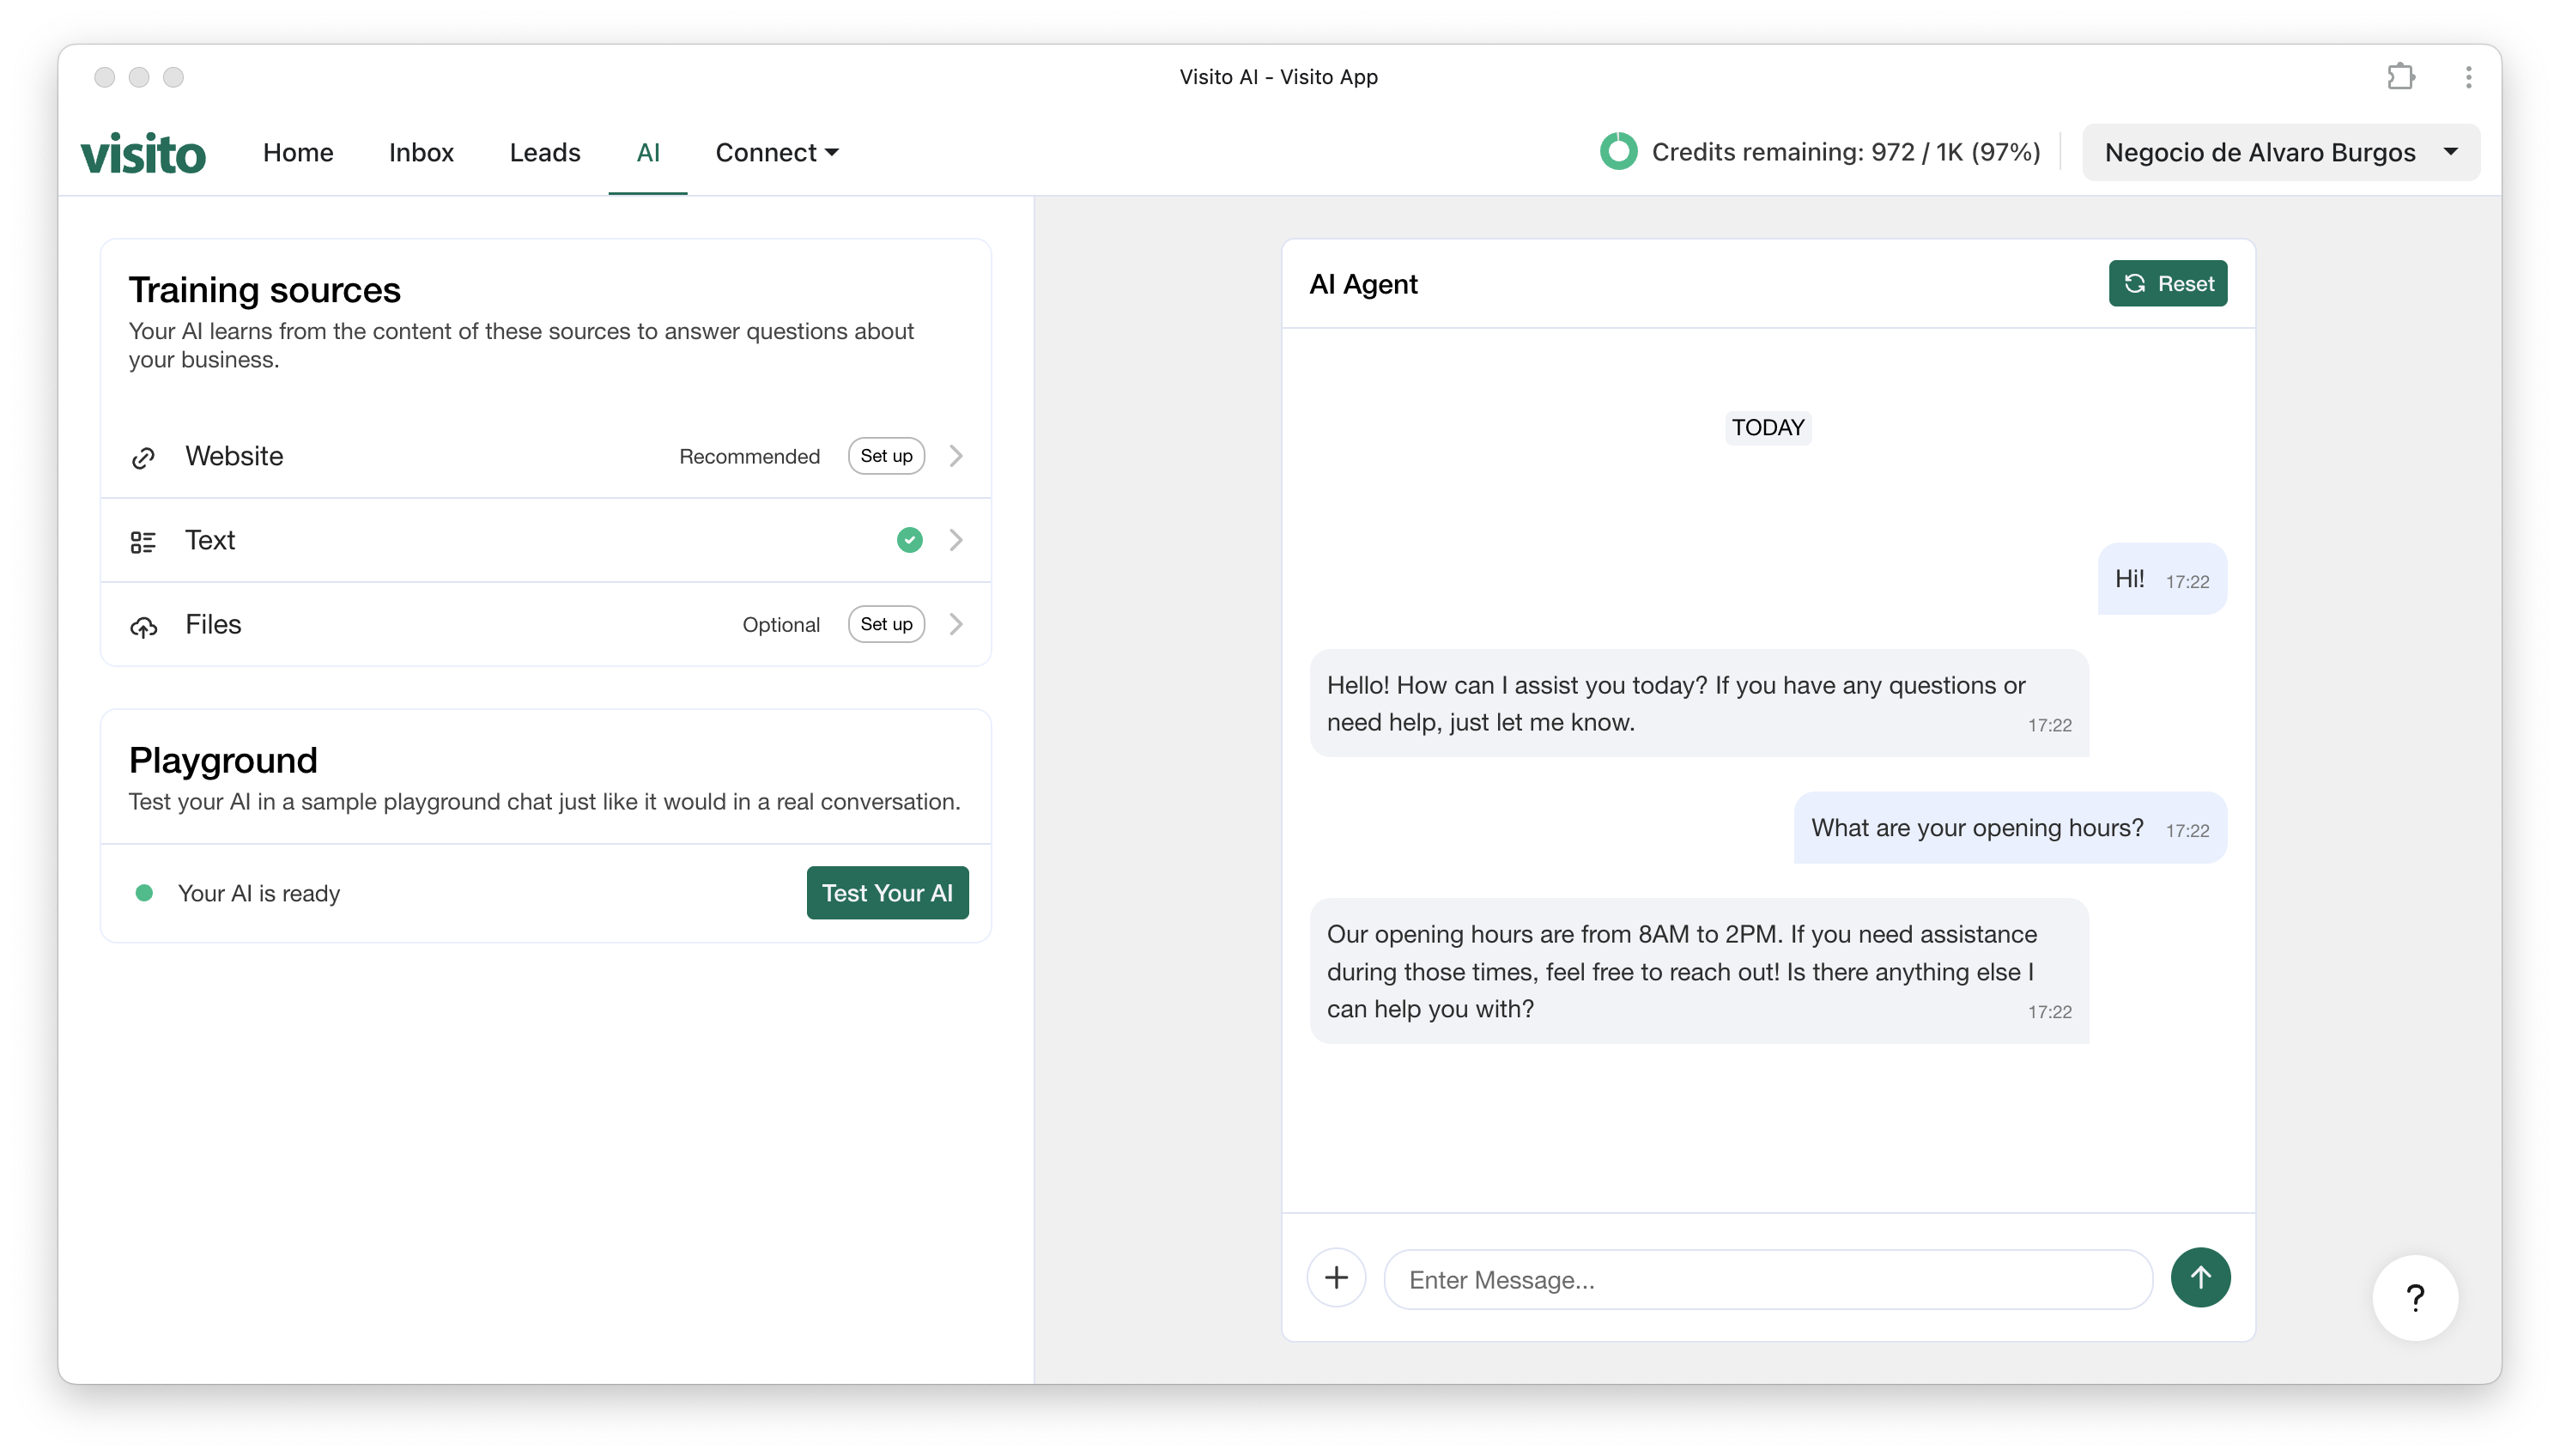
### 1. Train your AI with your business data
Navigate to the **AI** tab in the top navigation bar.\
In this section, you will see **Training sources**, where you can provide the content that your AI will learn from.
 You can add data through the following options:
* **Website**: Enter one or more URLs and Visito will automatically crawl your entire site and extract the content.
* **Text**: Paste or write custom text such as descriptions, instructions, FAQs, or policies.
* **Files**: Upload documents like PDFs and images.
Your AI uses this content to understand your business and respond accurately in conversations.
**Website** is the recommended training source for your AI agent. \ \
**Text**, however, is perfect for rapid fine-tuning. You can quickly add or adjust content - ideal for FAQ updates, temporary announcements, or refining how your agent answers specific questions.
### 2. Test and refine your agent
Once you’ve added your training sources, you can validate how your AI responds by using the **Playground**.
Within **AI** tab scroll down to the **Playground** section and click on **Test Your AI.**
You can add data through the following options:
* **Website**: Enter one or more URLs and Visito will automatically crawl your entire site and extract the content.
* **Text**: Paste or write custom text such as descriptions, instructions, FAQs, or policies.
* **Files**: Upload documents like PDFs and images.
Your AI uses this content to understand your business and respond accurately in conversations.
**Website** is the recommended training source for your AI agent. \ \
**Text**, however, is perfect for rapid fine-tuning. You can quickly add or adjust content - ideal for FAQ updates, temporary announcements, or refining how your agent answers specific questions.
### 2. Test and refine your agent
Once you’ve added your training sources, you can validate how your AI responds by using the **Playground**.
Within **AI** tab scroll down to the **Playground** section and click on **Test Your AI.**
 Here you can:
* Chat with your AI in real time
* Ask questions based on the data you’ve trained it with
* Verify accuracy and tone
* Identify missing information and update your training sources as needed
This environment behaves exactly like a real conversation across your channels, allowing you to refine your AI before connecting it to customers.
If you notice incorrect or incomplete answers while testing in the Playground, you can quickly improve your AI by updating your **Text** source or adding more details to your **Website** or **Files**.
* Use **Text** for fast fine-tuning
* Add missing information
* Refine definitions or common questions
* Update policies, instructions, or descriptions
Your AI will immediately reflect the new information.
### 3. Connect your AI to channels
Once you’re happy with your training data and the responses in the Playground, your AI is ready to go live.\
Connect it to any of your customer-facing channels so it can start responding in real conversations.
* [**Connect your AI Agent to a channel**](/product-guides/channels)
Each channel includes a quick setup process and guides to help you activate your AI smoothly.
Here you can:
* Chat with your AI in real time
* Ask questions based on the data you’ve trained it with
* Verify accuracy and tone
* Identify missing information and update your training sources as needed
This environment behaves exactly like a real conversation across your channels, allowing you to refine your AI before connecting it to customers.
If you notice incorrect or incomplete answers while testing in the Playground, you can quickly improve your AI by updating your **Text** source or adding more details to your **Website** or **Files**.
* Use **Text** for fast fine-tuning
* Add missing information
* Refine definitions or common questions
* Update policies, instructions, or descriptions
Your AI will immediately reflect the new information.
### 3. Connect your AI to channels
Once you’re happy with your training data and the responses in the Playground, your AI is ready to go live.\
Connect it to any of your customer-facing channels so it can start responding in real conversations.
* [**Connect your AI Agent to a channel**](/product-guides/channels)
Each channel includes a quick setup process and guides to help you activate your AI smoothly.