> ## Documentation Index
> Fetch the complete documentation index at: https://docs.visitoai.com/llms.txt
> Use this file to discover all available pages before exploring further.
# How to set up a new Visito hotel workspace
> Create a Visito workspace from your hotel website, review imported knowledge, personalize and test the AI agent, and prepare for launch.
New accounts start with a guided setup. Visito reads your public hotel website, creates a draft knowledge base, and walks you through the decisions needed for a useful first agent.
## Before you begin
Have these ready:
* Your hotel's public website URL
* The property name you want guests to see
* Your preferred agent name, tone, and message length
* Your booking-system login if you plan to connect it now
* Several real guest questions for testing
Use the hotel's official public website. Review every imported detail before launch; website copy can be incomplete, outdated, or written for marketing rather than guest support.
## 1. Start with your website
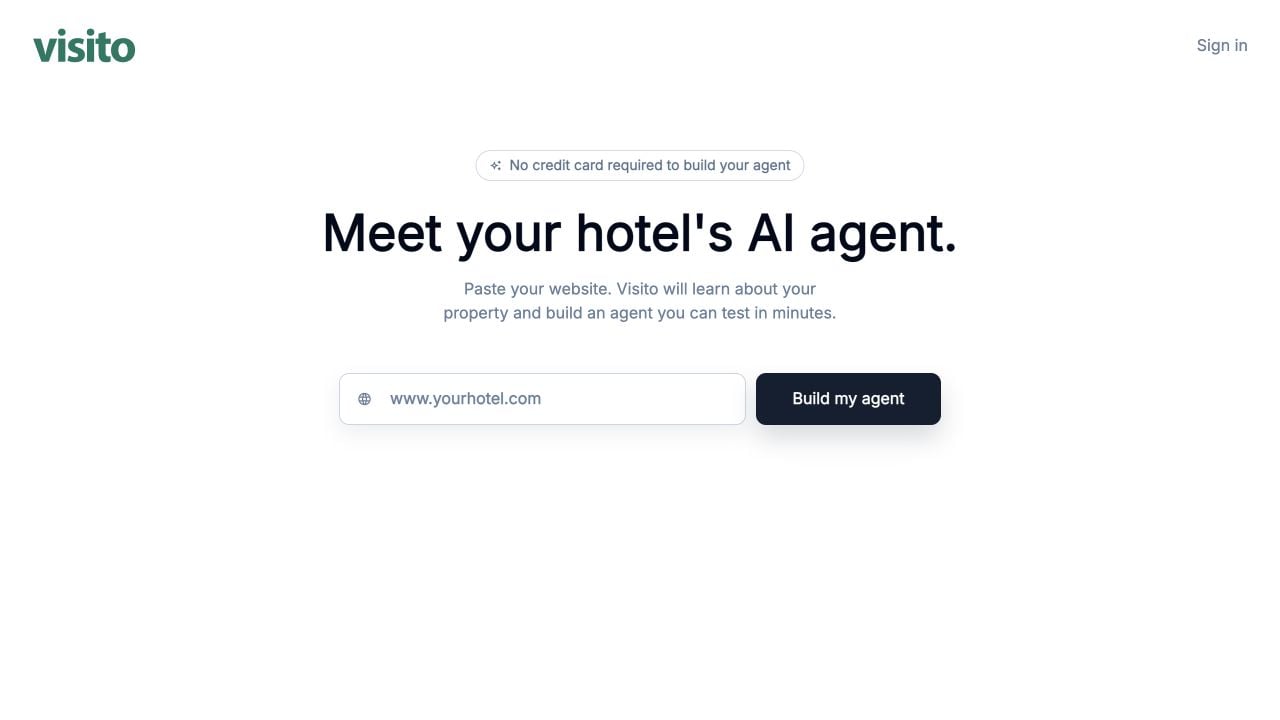
From the sign-in screen, select **Create account**. Enter the public hotel website and select **Build my agent**.
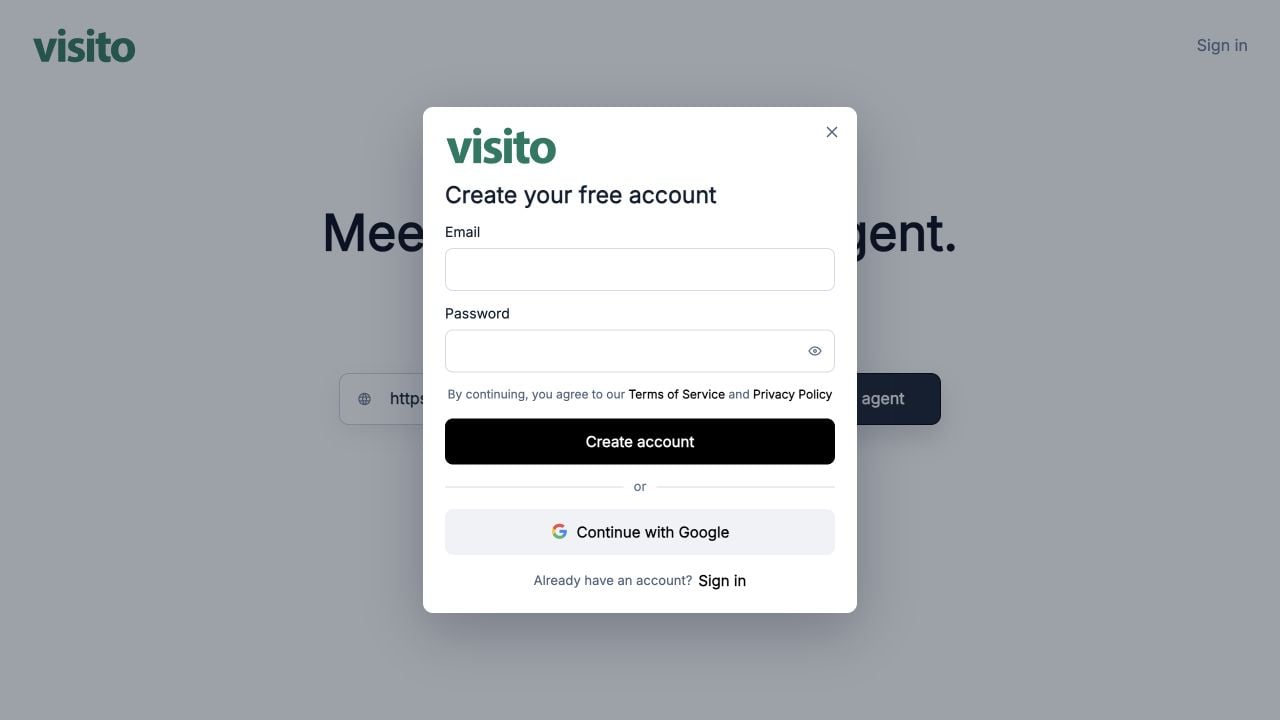
 Create the operator account that will administer the new workspace with email and password or **Continue with Google**. Use a shared operational address only if your team has an approved ownership and password-management process.
 ## 2. Review imported knowledge
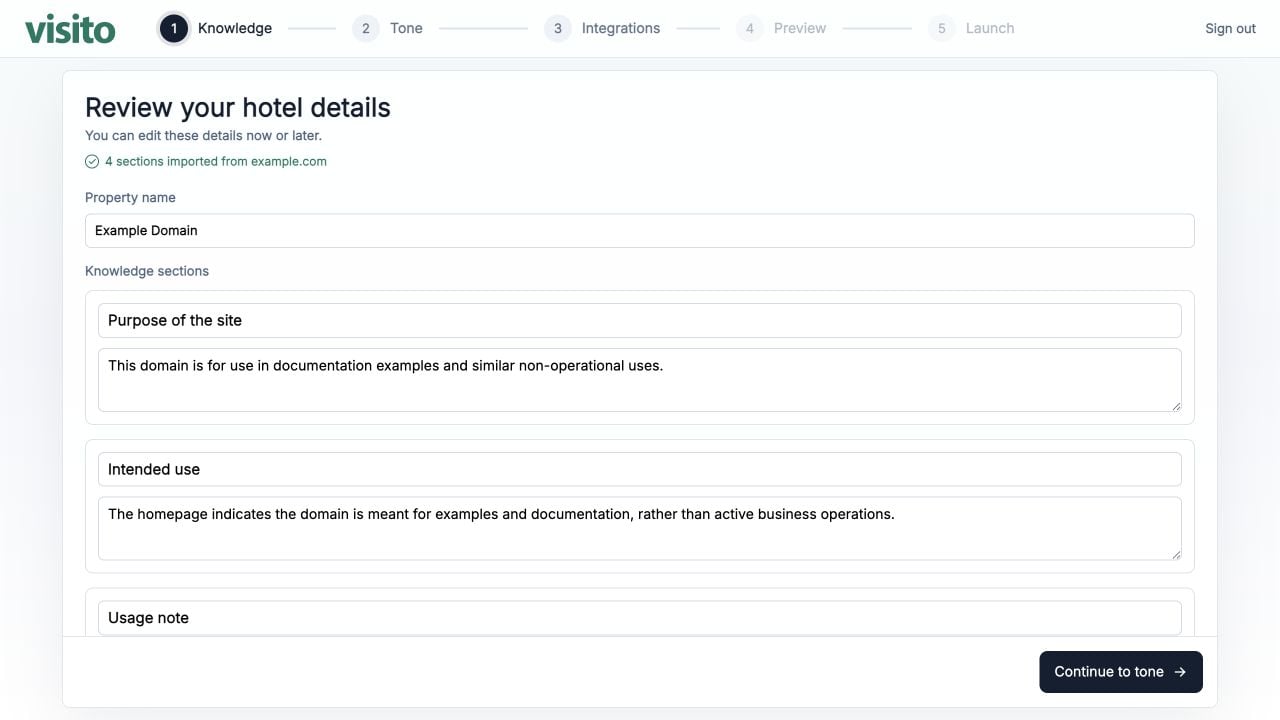
Visito proposes a property name and knowledge sections based on the website.
## 2. Review imported knowledge
Visito proposes a property name and knowledge sections based on the website.
 Before continuing:
* Correct the property name.
* Remove marketing language that does not answer a guest question.
* Add missing operational facts such as check-in, check-out, parking, breakfast, pet, cancellation, and contact policies.
* Keep one subject per section so the agent can retrieve the right answer.
* Do not invent an answer when the policy is unknown. Add an approved handoff path instead.
See [Knowledge Base best practices](/product-guides/best-practices/knowledge-base) for examples.
## 3. Choose the agent's tone
Choose whether the agent introduces itself by name, then select a starting style and message length. The preview updates as you make changes.
Before continuing:
* Correct the property name.
* Remove marketing language that does not answer a guest question.
* Add missing operational facts such as check-in, check-out, parking, breakfast, pet, cancellation, and contact policies.
* Keep one subject per section so the agent can retrieve the right answer.
* Do not invent an answer when the policy is unknown. Add an approved handoff path instead.
See [Knowledge Base best practices](/product-guides/best-practices/knowledge-base) for examples.
## 3. Choose the agent's tone
Choose whether the agent introduces itself by name, then select a starting style and message length. The preview updates as you make changes.
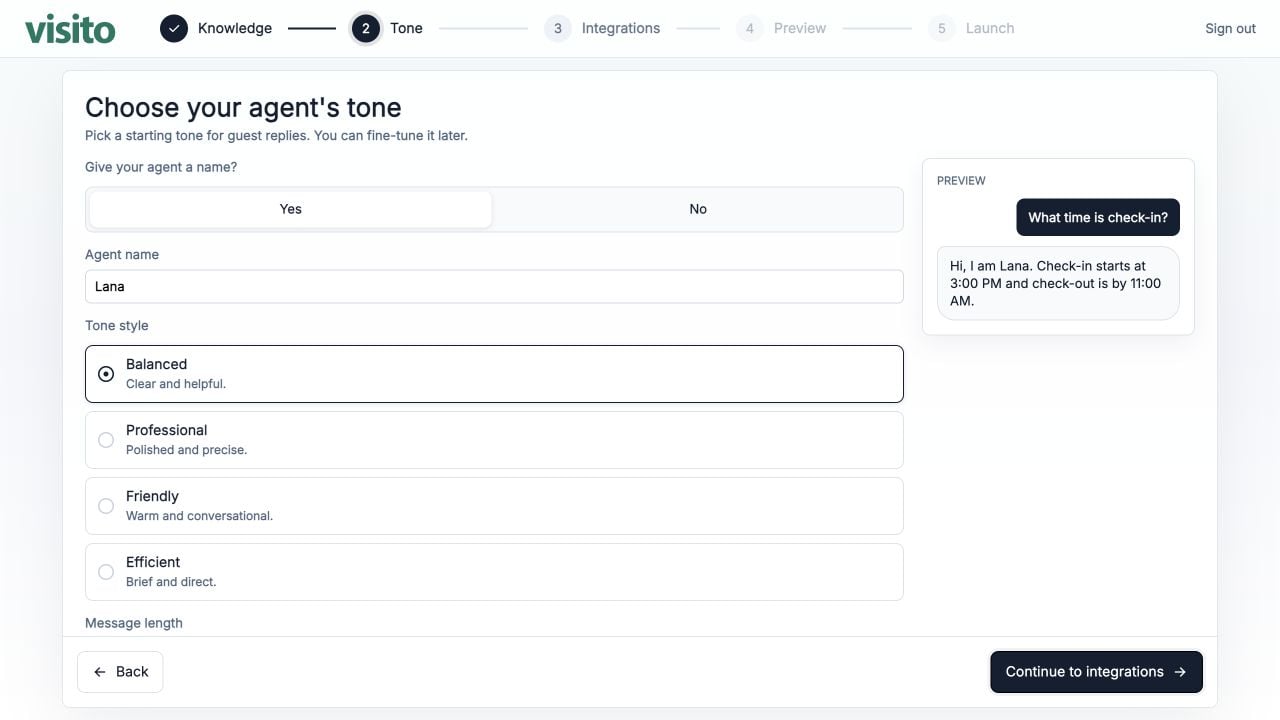 Start with **Balanced** and **Default** if your team has no existing voice guide. After onboarding, use **Personalization** for custom instructions, language rules, required disclaimers, and brand-specific phrasing.
See [Custom instructions best practices](/product-guides/best-practices/custom-instructions) for patterns and examples.
## 4. Connect a booking system
Connect a supported booking system if you want the agent to use live availability and rates. You can also select **Skip for now** and connect it later from **Integrations**.
Start with **Balanced** and **Default** if your team has no existing voice guide. After onboarding, use **Personalization** for custom instructions, language rules, required disclaimers, and brand-specific phrasing.
See [Custom instructions best practices](/product-guides/best-practices/custom-instructions) for patterns and examples.
## 4. Connect a booking system
Connect a supported booking system if you want the agent to use live availability and rates. You can also select **Skip for now** and connect it later from **Integrations**.
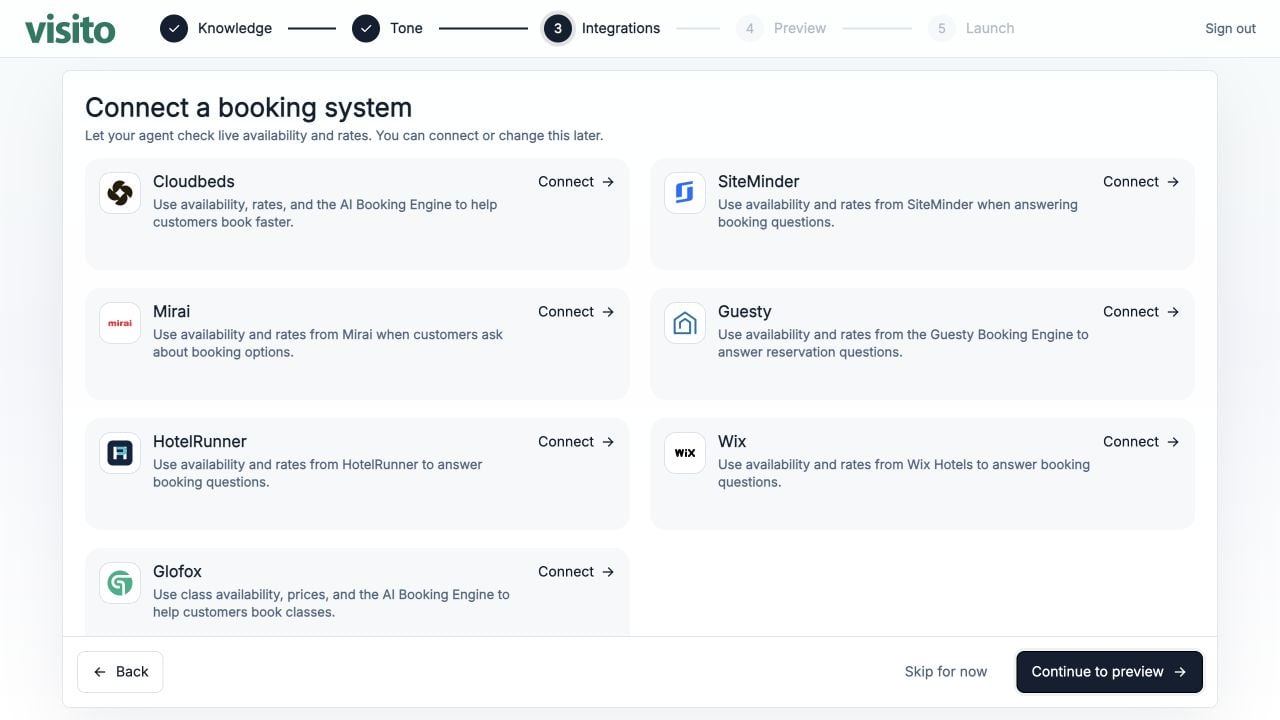 Skipping is safer when you do not have the correct administrator credentials or when a property mapping still needs to be confirmed. Finish the agent setup, then ask the integration owner to connect and test the system.
## 5. Preview with real questions
The Preview step creates a temporary chat where you can test the draft before launch.
Skipping is safer when you do not have the correct administrator credentials or when a property mapping still needs to be confirmed. Finish the agent setup, then ask the integration owner to connect and test the system.
## 5. Preview with real questions
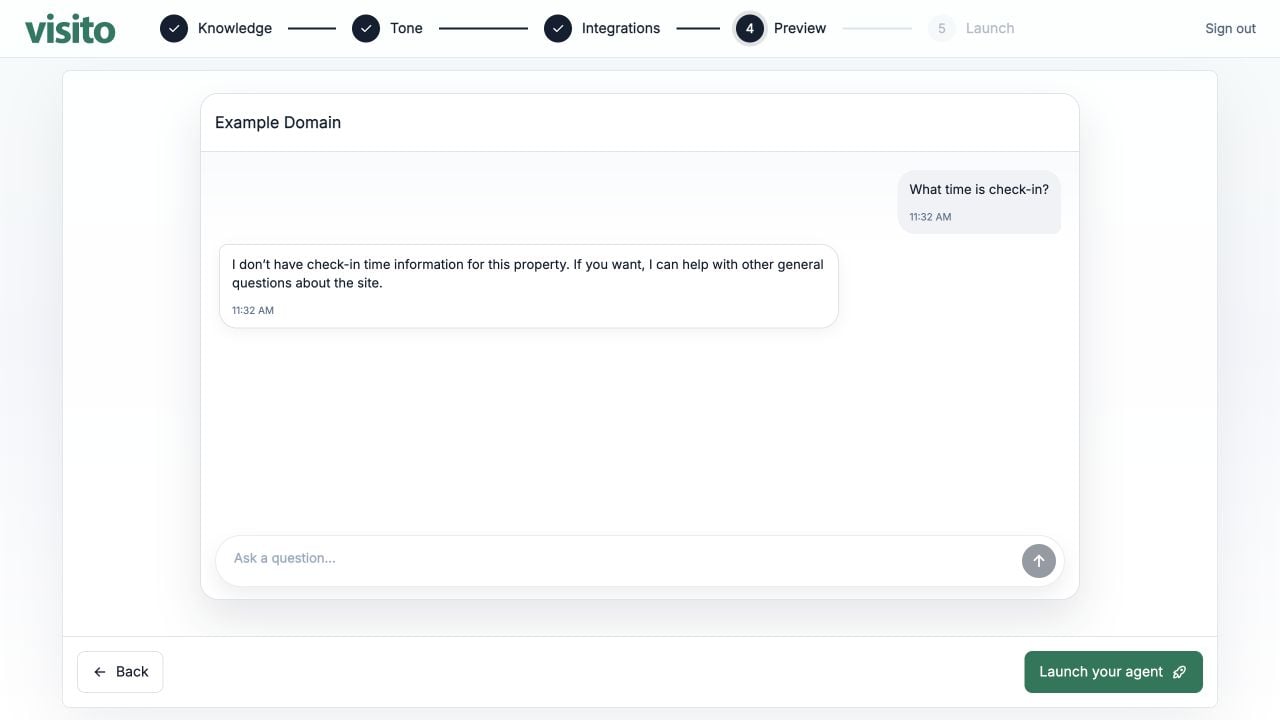
The Preview step creates a temporary chat where you can test the draft before launch.
 Test at least:
1. A common factual question with a known answer.
2. A policy question with conditions or exceptions.
3. A question the website does not answer.
4. A booking or availability question if an integration is connected.
5. A request that should escalate to a person.
An honest “I don't have that information” response is better than a confident guess. Add the missing fact to Knowledge Base, or configure a handoff rule, and test again.
## 6. Launch and continue setup
Select **Launch your agent** when the draft behaves as expected. Visito then shows the available activation options for your workspace.
After activation:
* Open **Knowledge Base** and confirm the imported sources.
* Open **Personalization** and refine instructions.
* Open **Handoff Rules** and define team availability and escalation paths.
* Connect and test at least one guest channel.
* Run the [testing and go-live checklist](/product-guides/best-practices/testing-and-go-live).
Pricing and activation options are shown in the product because they can change. Review the current options during launch.
Test at least:
1. A common factual question with a known answer.
2. A policy question with conditions or exceptions.
3. A question the website does not answer.
4. A booking or availability question if an integration is connected.
5. A request that should escalate to a person.
An honest “I don't have that information” response is better than a confident guess. Add the missing fact to Knowledge Base, or configure a handoff rule, and test again.
## 6. Launch and continue setup
Select **Launch your agent** when the draft behaves as expected. Visito then shows the available activation options for your workspace.
After activation:
* Open **Knowledge Base** and confirm the imported sources.
* Open **Personalization** and refine instructions.
* Open **Handoff Rules** and define team availability and escalation paths.
* Connect and test at least one guest channel.
* Run the [testing and go-live checklist](/product-guides/best-practices/testing-and-go-live).
Pricing and activation options are shown in the product because they can change. Review the current options during launch.