
The screenshots show a controlled local test with synthetic identifiers. Replace the example ngrok address with your own. No customer conversation was created or replayed for these tests.
Before you start
You need admin access, a receiver you control, and a public HTTPS address on port 443.localhost:3000, HTTP URLs, private addresses, and IPv6-only destinations are not supported. Use an HTTPS tunnel for local development.
If the page reports missing signing configuration, an unavailable worker, or delivery not enabled for the workspace, contact your Visito administrator. An Enabled endpoint describes its configuration; it does not prove delivery is operational. Creating an endpoint requires compatible worker and signing configuration; sending a test additionally requires workspace delivery enrollment.
1. Start a local receiver
The complete Python example verifies the signature against the exact request bytes, checks the timestamp, durably stores accepted events in SQLite, and deduplicates by event ID. Use Python 3.10 or later. It uses only the standard library. From the example directory:503. WEBHOOK_FAIL_FIRST=1 intentionally returns 503 for the first correctly signed request for each event, then accepts its retry. Omit it for normal acceptance.
In another terminal, start your already configured ngrok client:
ngrok http 8765 --url=YOUR-DOMAIN. Your webhook destination is:
2. Create the webhook
- In the correct workspace, open Developers → Webhooks and select Create webhook.
- Enter a recognizable Name and your full HTTPS destination, including
/webhooks/visitofor this example. - Select the events your application needs. For this walkthrough, select only
message.created. - Select Save webhook.
- Copy the signing secret immediately and store it securely. It is shown only once. There is no API-key selector.
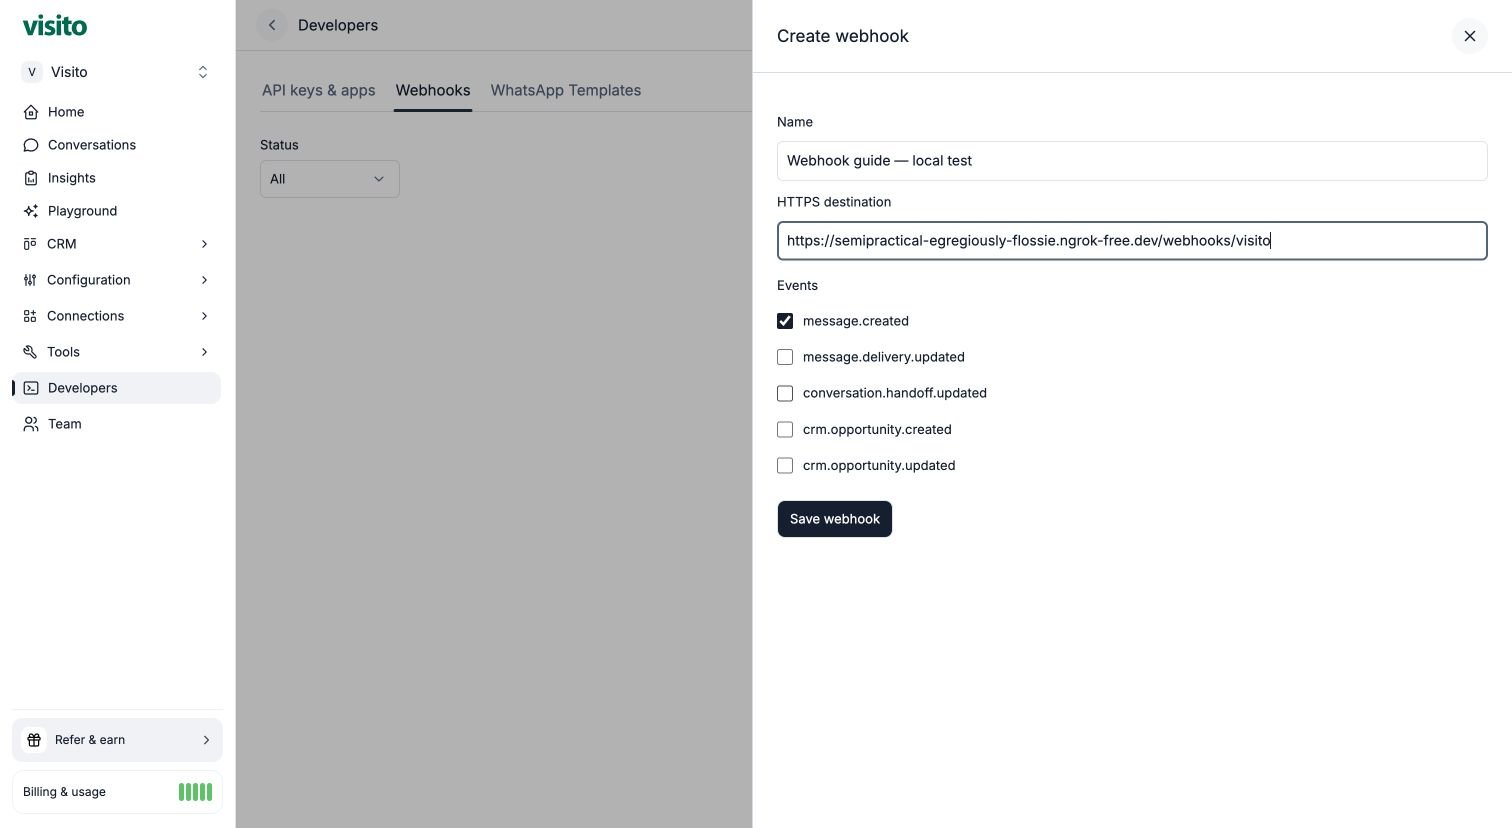
Available events
Real events contain metadata, such as resource IDs and state changes, rather than conversation bodies. Use the scoped API if your integration also needs resource content. Internal system/tool turns and Playground messages are excluded.
3. Send a test event
Open the saved endpoint, select Send test event, choose one of its subscribed event types, and review the payload and destination. Select Confirm once.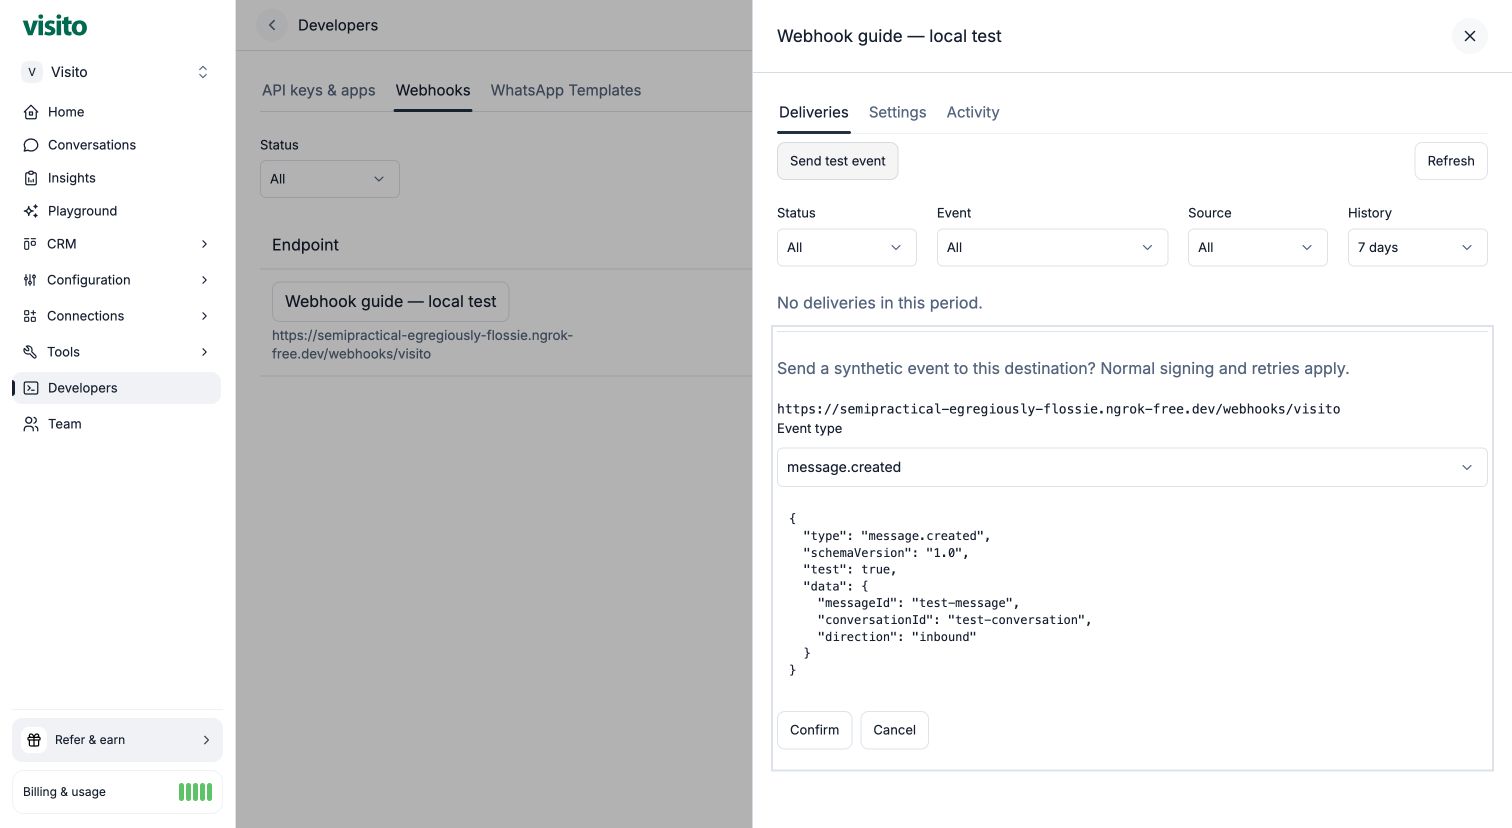
schemaVersion: "1.0" and add test: true. Resource identifiers are synthetic; the test creates no message, conversation, or CRM business record. Your receiver still receives a real HTTPS request, so have it route test events away from business actions.
Tests require an active, authorized endpoint and a ready worker. The limit is one test per endpoint per minute. The dashboard supplies an idempotency key to avoid duplicate creation from the same request. Wait for the result rather than repeatedly clicking Confirm.
4. Inspect delivery and attempts
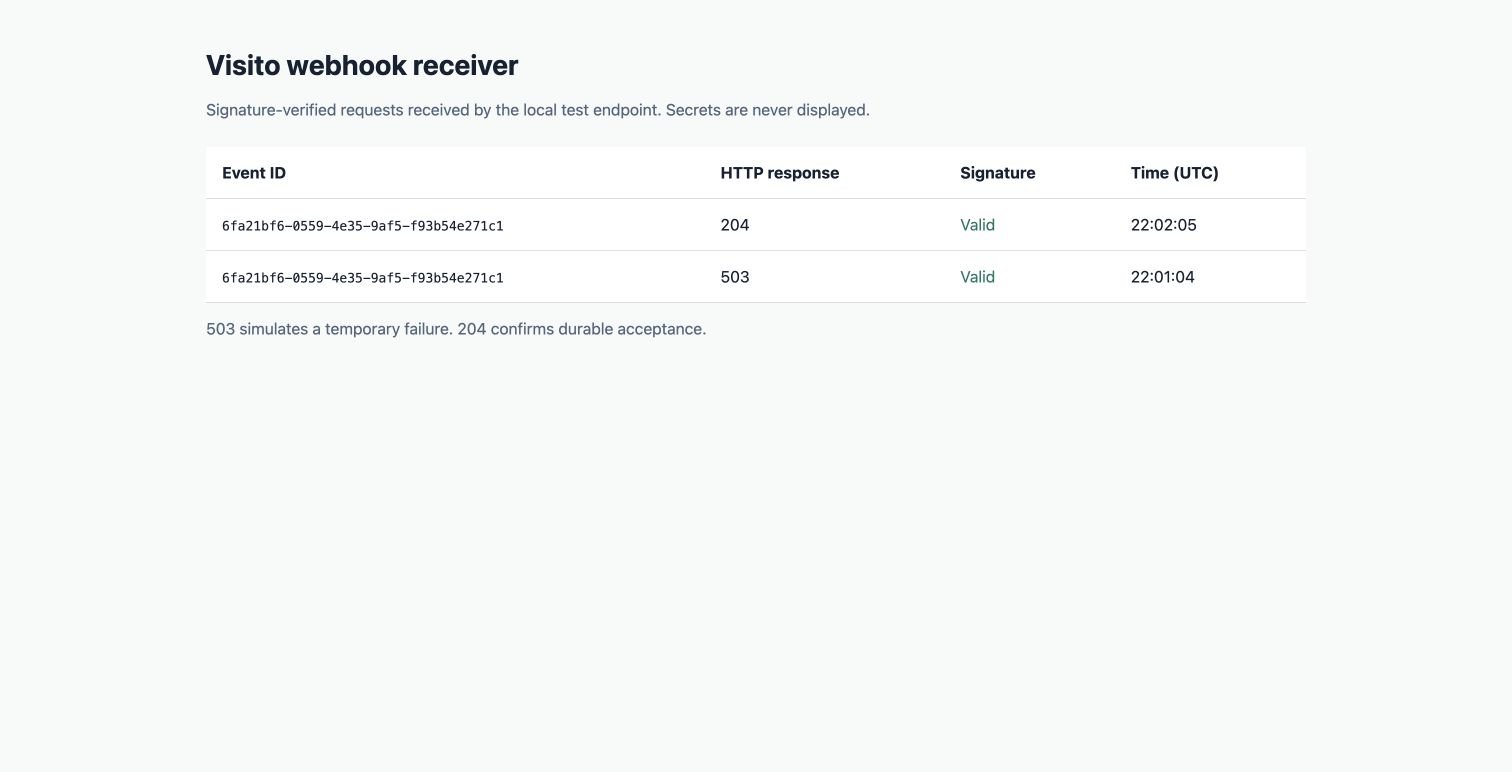
In Deliveries, select the test. The detail includes its event ID, delivery ID, JSON payload, state, next retry when applicable, and individual attempts. Filter by status, event, Test/Real, and history. The default is seven days, with choices up to 30 days. In this walkthrough, attempt 1 returns503 deliberately. The delivery remains Pending, and Visito schedules the next attempt after about one minute. Once that retry receives 204, the delivery becomes Delivered. Both attempts share the same event ID.
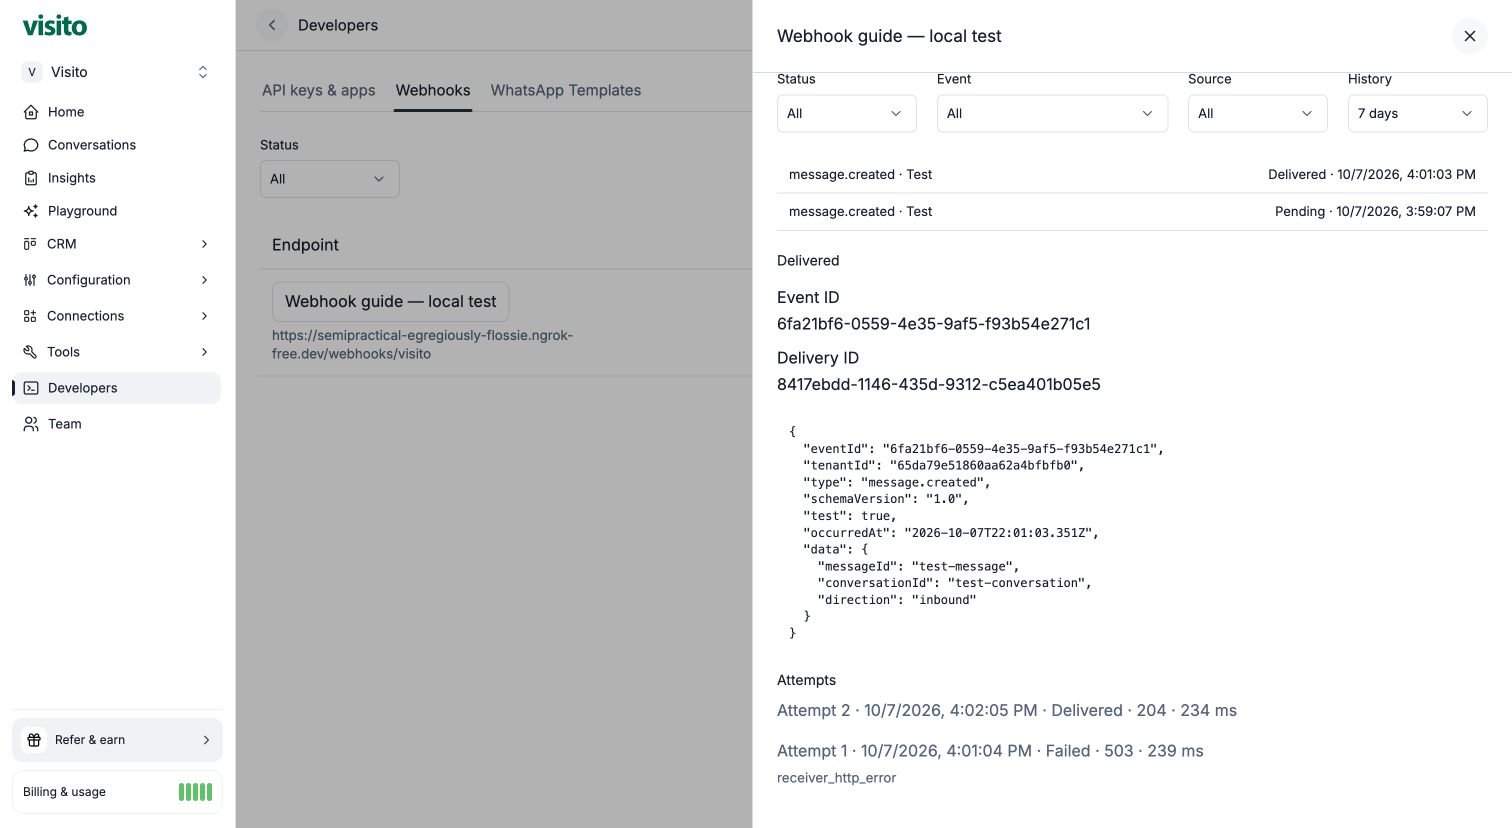
http://127.0.0.1:8765 locally to see the example receiver’s signature checks. That diagnostic page is not served through the public ngrok hostname.
Use Refresh to update the list. An open pending delivery refreshes at most every ten seconds, stopping when terminal, when the page is hidden, or when the drawer closes. You can copy the page URL to link another authorized admin to the selected endpoint/delivery.
Attempts show start time, duration, HTTP status when available, and a safe failure reason. Receiver response bodies, arbitrary headers, signatures, and secrets are not stored. Older records may explicitly lack attempt-level history. Attempt/activity records have 30-day retention; terminal delivery metadata is retained for 30 days after completion.
Retries and deduplication
There is one initial attempt plus six retries, delayed by 1 minute, 5 minutes, 30 minutes, 2 hours, 8 hours, and 24 hours after successive failures. Each attempt has a 10-second deadline. Queueing and recovery can add delay. Redirects are not followed. Delivery is at least once and ordering is not guaranteed. Verify every request and durably deduplicate byeventId. A manual Retry delivery is available only for terminal failures: it starts another attempt cycle while preserving the event ID and earlier attempt history. It does not bypass receiver deduplication.
The service limits concurrent sends to ten globally and two per workspace. Return 2xx promptly after durable acceptance; process expensive business work separately.
Verify signatures in your own application
Read these headers:timestamp + "." + rawBody. Compare in constant time and reject timestamps outside a five-minute tolerance. Verify before parsing JSON, retain exact bytes, and keep your server clock synchronized. Check the header event ID matches the envelope, then deduplicate durably.
Do not use a JSON body parser that rewrites the request before verification. Do not authenticate by destination URL alone. The API reference includes a JavaScript verifier; the Python example demonstrates verification and durable acceptance together.
Manage settings and ownership
Open Settings to change the name, destination, subscribed events, or enabled state. Review Activity for the sanitized configuration history.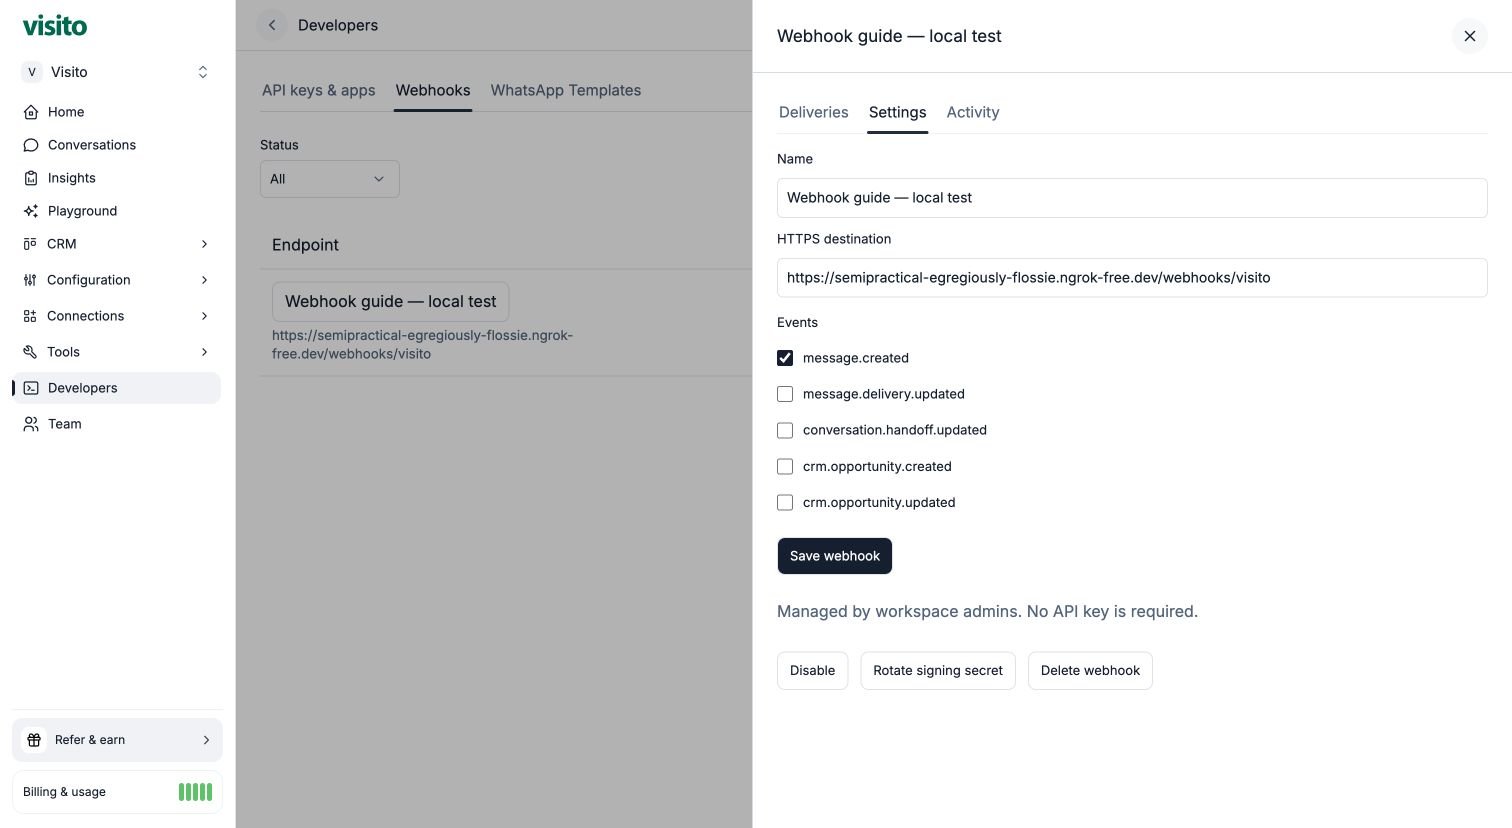
Dashboard-managed subscriptions belong to the workspace. The creating admin leaving or their session expiring does not stop delivery; current workspace admins manage the endpoint.
Credential-bound subscriptions created through the API depend on the owning credential’s scope, expiry, and revocation. Legacy subscriptions retain this behavior. Dashboard admins can inspect and edit both kinds. Ordinary dashboard edits do not change the authorization mode.
For a credential-bound endpoint, Transfer to dashboard management asks you to confirm that future credential revocation will no longer stop delivery. It preserves the destination, signing secret, event IDs, and delivery history and records who transferred it and when. Reverse transfer is not available in this version.
API clients still need webhook scopes and the event-read permissions for affected events to mutate tenant-managed subscriptions. Such mutations do not silently attach the API caller’s credential. See the API contract.
Troubleshooting
Finish a local test
Disable the test webhook and confirm its disabled state before stopping the receiver or ngrok. This avoids leaving an enabled endpoint pointing at an offline laptop. Preserve the delivery history for review. Stop both local processes with Ctrl+C and remove the local secret when you no longer need it.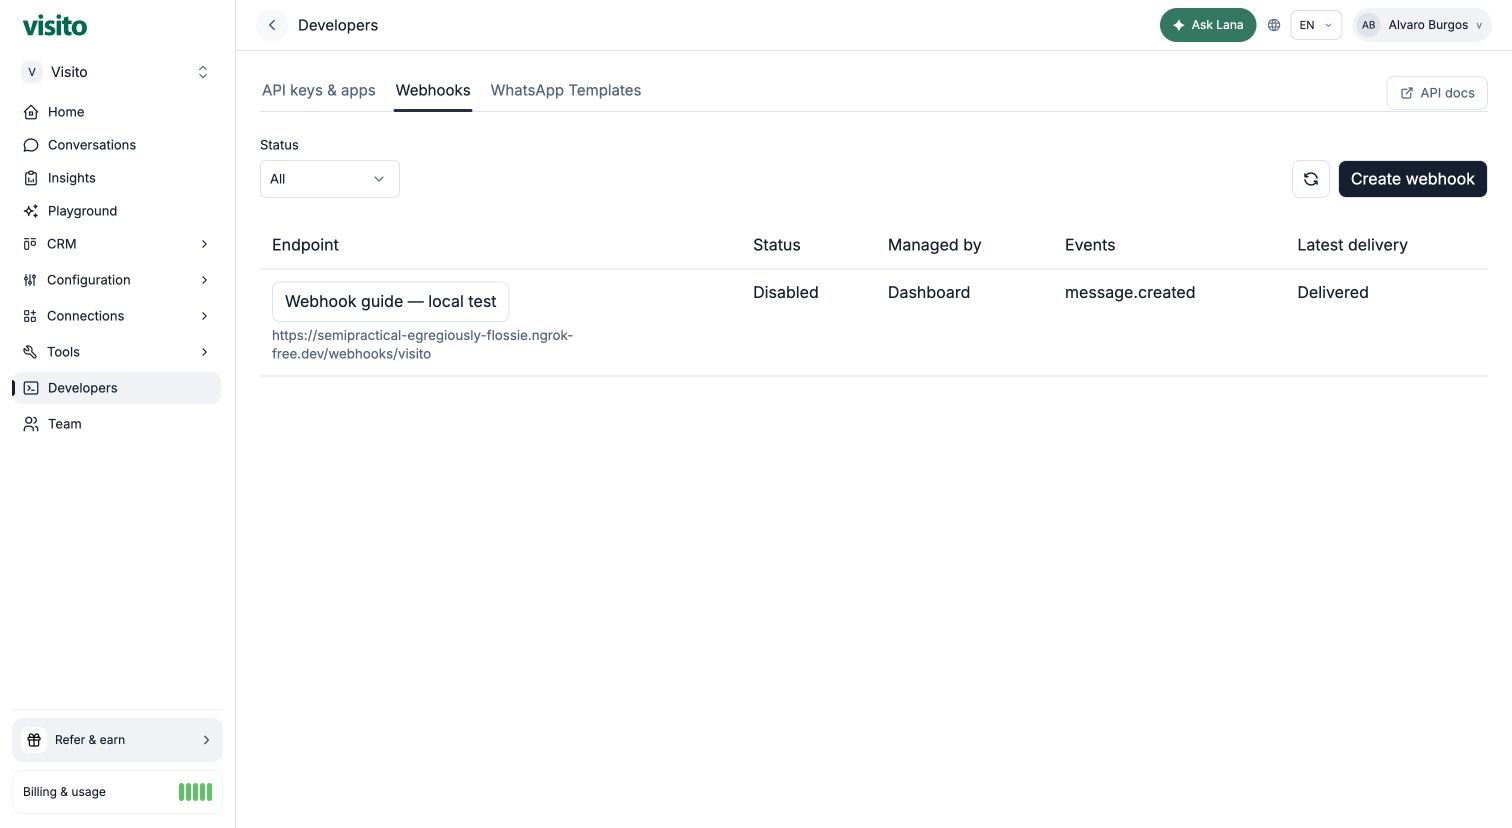
503, and automatic recovery to 204 with the same event ID. It does not by itself verify real-event producer capture, all failure cases, or production performance for your receiver.